

Recent Articles
Thursday, 24 October 2013
Thursday, 24 October 2013
- 1 Comment
Blogger.com - The one of the most popular, best and free blogging platform for beginners and pros to kick off their blogging career. It is being owned by Google and that's the reason it has become one of the most popular platform. Google is trying to improve the Blogger day by day as we can see that every month/week any new update is being released in blogger system. It is also being more strict to its policies which is even better to kick the spammers and violators from this platform. Well, You can find a lot of hacks, tutorials, tricks, tweaks for blogger which are being published by many pro users of blogger and we're also sharing them here at blogger yard. Today, we're going to share something special and you might don't have seen this anywhere else before so, today we're sharing some small hidden blogger tricks which every user should know.


Small Hidden Blogger Tricks Every User Should Know
These are some hidden tricks in the blogger.com platform which can helpful for anyone in managing his/her blog properly. Basically, These tricks are already built-in in blogger but most of the users don't know about them and they keep asking others. So, Today I decided to share a handy collection of these tricks which will surely help you.
1. Easily Hide "Pages" Widget and Links
There is the "Pages" widget in blogger which you might have seen in custom and default templates. Sometimes, that widget is located in the wrong place or it is not needed for some so anyone might want to remove or hide it from his blog. So, This first trick will show your how to hide pages widget in blogger.
- Go To Blogger >> Dashboard >> Pages
- There you will see the pages you've created.
- At the top, There will be option "Show Pages as".
- So click it and choose "Don't Show"
- That's it.
2. Change Template Of Blog For Mobile Device
You may be receiving huge number of visitors from mobile devices so it can be important for you to setup a good template for mobile devices. In other words, that template should only appear in mobile devices. unfortunately, we can't upload custom templates for mobile but you can use default templates or current desktop template for mobile so here is how you can do it.


- Go To Blogger >> Dashboard >> Template
- There will be two sections, 1. Live on Blog 2. Mobile
- In the second Mobile section, click the Settings icon.
- Now, Choose any template and also Preview it.
- Click Save button at the bottom right.
- That's It.
3. Hide Your Blog From Search Engines
Sometimes we need to create such blogs which should be away from search engines. In other words, sometimes we want to disable our blog from getting indexed in search engines so we also have this feature available in Blogger to hide blog from search engines. Below the simple tutorial for it.
- Go To Blogger >> Dashboard >> Settings
- In the basic section, there will be Privacy option.
- Click on edit and choose what you want.
- Finally, Click Save Changes orange button.
- You're Done!
4. Make Your Blog Private
Along with hiding your blog from search engines, we can also hide our blog from all other people. Simply, we can also make it private or only for some members. The simple tutorial for it is given below.
- Go To Blogger >> Dashboard >> Settings
- In the Permissions section, there will be Blog Readers option.
- Click on edit, and choose the appropriate option according to your needs.
- Click Save Changes button to complete the process.
- It's Done!
5. Add Multiple Authors In Your Blog
Sometimes, an alone author or contributor can not serve the readers regularly so here it is important to have multiple authors for the proper contribution. We can also make multiple authors in a single who can publish new posts on your blog. They can also manage your blog from every side if you give them admin rights. For inviting multiple authors here is the tutorial.
- Go To Blogger >> Dashboard >> Settings
- In the Permissions section, there will be Blog Authors option.
- Click on +Add Authors and a box will appear.
- Now, In this box, you've to paste or type the email address of those authors.
- In the last, click on Invite Authors button.
- Now they will receive an email from Blogger that you've invited them to contribute on your blog.
- Here it's their choice to accept the invitation or not.
- If they accept the invitation, then they will get your blog in their blogger dashboard.
- That's it.
6. Show Limited Number Of Posts In Homepage
This is the sixth trick in which we're going to learn that how can we show the limited number of posts in homepage only and it's always important because showing a lot of posts in homepage can make your blog load lazy. The easiest tutorial is given below.

- Go To Blogger >> Dashboard >> Settings >> Posts and Comments
- In the posts section, there will be Show at most.
- And write the total number of posts in that box which you want to show in homepage.
- Click Save Changes and You've done!
7. Change The Comment Form Location
Mostly, all the blogs are having comment form below each post but you might have noticed such blogs whose comment form's location is changed. We can do this easily by changing option from settings only. Test out the tutorial given below.
- Go To Blogger >> Dashboard >> Settings >> Posts and Comments
- In the comment section, There will be option Comment Location.
- Click in drop down button and choose the new location.
- Click Save Changes and You've Done!
8. Show Comment Form Message "Comment Policy"
Sometimes we get a lot of spam, abusive and bad comments which are harmful for our blog so we need to protect our from this like showing captcha, comment moderation and more. In this trick, I'm going to show you that how can we add comment form message or "Comment Policy" which can affect on spammers to stop posting bad comments.
- Go To Blogger >> Dashboard >> Settings >> Posts and Comments
- In the Comments section, There will be Comment Form Message in the last.
- Click on Add link and a box will appear.
- Paste your comment form message or write it in that box.
- Click Save Changes.
- You're Done!
9. Stop Receiving Comment Moderation Emails
When that time comes, you start receiving a lot of comments in your old and new posts then comment moderation is important for it in order to avoid posting bad spammy and abuse comments which can harm your blog. But, when you enable comment moderation it sends the email notification in your Gmail account and it irritates. So in this trick, you're going to learn how can we stop receiving comment moderation emails.

- Go To Blogger >> Dashboard >> Settings >> Mobile and Email
- In the Email section, there will be Comment Notification Email option.
- In that box, you will see your email address where you receive the notification emails.
- Below that box, there will link Remove.
- Click it and Click Save Changes Button.
- Now you will no more comment notification emails.
10. Send Blog Updates To Specific 10 Email Contacts
Commonly, we use to setup our blog on Feedburner in order to send the blog email updates to our subscribers but it requires to verify the email. There is another special feature in blogger that we can send blog updates to specific 10 email contacts. To protect from spam, we can send updates to only 10 contacts who will not require to verify their emails.
- Go To Blogger >> Dashboard >> Settings >> Mobile and Email
- In the Email section, There will be Email Posts To option.
- Click on Add link and paste or write the 10 emails separated with commas.
- Click Save Changes button at the top right corner.
- You're Done!
11. Change The Language Of Your Blog
Bloggers allows you to blog in every language which you want so there is option to change the language of your blog completely. Which can be helpful for those who receive traffic from only specific area and may be there any specific language is being used. Well, If you want to change language of your blog then simply follow the below tutorial.
- Go To Blogger >> Dashboard >> Settings >> Language and Formatting
- In the language section, There will be first Language option.
- Click the drop down button and choose you new language.
- Click Save Changes in the top right corner.
- Check Your Blog and You're Done!
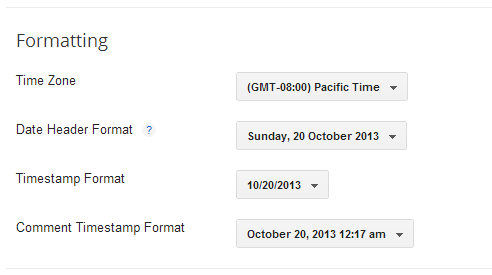
12. Change The Timezone, Time Format and Date
After the language of your blog, then is next trick which is about changing the time zone, time format and date which is being showed up in your blog like inside posts, date header and more. For the proper SEO, Google recommends to show date of post instead of time. Here is the tutorial to change that all things.
- Go To Blogger >> Dashboard >> Settings >> Language and Formatting
- In the formatting section, There will be options to change Time zone, Time Format and Date.
- Simply, Click any drop down button and change it as per requirements.
- In last, don't forget to click Save Changes button.
- That's it.
13. Send Short, Custom and Until Jump Break Mails To Subscribers
There is an option in blogger by which we can send the customized, short and until jump break (read more) small emails to the email subscribers. And by sending short mails, we can protect our content from being content instead of sending full mails. But it is according to your choice which option you select. I just want to inform you about that feature which you can use in future.
- Go To Blogger >> Dashboard >> Settings >> Other
- In the Site Feed section, There will be Allow Blog Feed option.
- Click the drop down button and choose the settings according to your needs.
- Click Save Changes button.
- You're Done!
14. Add Custom Post Feed Footer In Subscription Emails.
This is the 14th trick in which we're going to learn that how can insert the custom post feed footer in subscription emails. You can create or write the message which will be showed up in email footer which will be sent to the email subscribers of your blog.
- Go To Blogger >> Dashboard >> Settings >> Other
- In the Site Feed section, There will be Post Feed Footer option.
- Click on Add link and paste your footer message there.
- Click on Save Changes button.
- It's Done!
15. Enable "Adult Content" Feature To Protect Your Adult Blog
Blogger also allows you to provide the adult content on your blog but for that you will need to enable the adult content feature in your blog. After that, when someone will access your blog then it will ask that the page contains nudity content and if he/she accepts then he can access your blog. This can also save your blog from being deleted by automated classification system.


- Go To Blogger >> Dashboard >> Settings >> Other
- In the Adult Content section, Click on Drop down button and choose Yes to enable it.
- Click Save Changes button at the top right corner.
- You're Done.
16. Easily Install Google Analytics In Blogger
As the blogger and analytics are both managed by Google officially then Blogger also provides you an easy method to install Google Analytics in your blog. You just need to insert the tracking ID in blogger settings and it will start tracking your visitors. It is better than tracking code method because tracking code method requires to insert JavaScript code and JavaScript can make your blog load lazy. If this guide doesn't work then kindly checkout this post : Analytics Not Working In Blogger With Tracking ID
- Go To Blogger >> Dashboard >> Settings >> Other
- In the Google Analytics section, There will be Google Analytics Web Property box.
- Paste your Analytics tracking ID in that box.
- Click Save Changes.
- You're Done!
17. Revert To Old Blogger Profile Account
When Blogger started updating it's system then it released a lot of new features and connecting Google+ profile in blogger is also one of them which is better to engage our blogs with Google+ and it can bring positive change in Google SERP. Well, some of you guys might want to get back that old blogger profile account so this tutorial is for that.
- Go To Blogger >> At the top right corner there will be Settings Icon below the logout section.
- Click that Settings Icon and Click on Revert To Blogger Profile.

- Now click on Switch To Limited Blogger Profile orange button.
- You're Done!
18. How To Use Blogger Draft?
Have your heard about Blogger Draft? If no then let me tell you about that. Blogger draft is the special version of blogger where blogger team try or create new features before releasing it to original Blogger.com or to everyone. You can read the Blogger In Draftofficial blog to know more about that. Here is the tutorial that how can we use blogger draft.
- Go To Blogger >> At the top right corner there will be Settings Icon below the logout section.
- Click that Settings Icon and Click on Edit User Settings.
- Tick the check box Use Blogger Draft
- Click the Save button.
- That's it.
19. Stop Receiving Email Notifications About Feature Announcement
You might have noticed that whenever Blogger announces any new feature in their platform then it sends the email to all the users and you might have received them sometimes. Is it annoying you ? or you want to stop it then this tutorial is for you. Let me teach you that how can we disable receiving email notifications about feature announcements in blogger.
- Go To Blogger >> At the top right corner there will be Settings Icon below the logout section.
- Click that Settings Icon and Click on Edit User Settings.
- In the Email Notifications section, You will see that the Feature Announcement checkbox is checked.
- Just Uncheck it.
- Click Save button and you're done!
20. Stop Following a Blog Through Google Friend Connect Widget
Blogger has an official widget named Followers which is also known Google Friend Connect Widget and it being used by many bloggers contributors and as well as by readers to get in touch with the latest content. Mistakenly, If you've followed the wrong blog or even If you want to stop following it then this tutorial can be useful for you. Here is the tutorial.
- Go To Blogger >> In the bottom there will be Reading List section.
- In the Reading List, there is icon in the right side.
- Click that Icon and you will see those all blogs which you're following.
- There will Settings link in the right side with the every blog.
- Click Settings Icon and login with the account by which you had followed that blog.
- Now there will be Stop Following This Site in the right side.
- Click it and a popup will appear for confirmation.
- Confirm that you want to stop following it.
- That's it.
Final Touches
So friends these were twenty small hidden blogger tricks which every user should know because they can be useful in the future. Seems like the this post has become too long and it has made me tired. Well, I hope you've liked these tutorials and keep visiting to get more special things like this. If you've more tricks then please share with us in comments and don't forget share this with your friends. Take a lot of care of you and your family.
Google has been making the web search better than previous as for it Google has introduced many algorithms in past, present and will also bring more algorithms in future. Google penguin is known as one of the most dangerous algorithm for bloggers and as well as web masters. This is the quick news that Google has recently introduced the Google Penguin 2.1 which is live now and only 1% of total searches are affected. So, Today in this post, we're going to discuss about Google Penguin 2.1.
What Is Google Penguin?
Google Penguin is the algorithm by Google which is being updated after every 3/4 months, in simple words, it is updated 4 times a year. Google Penguin's first update was announced on April 24, 2012. Along this update, There are total 5 updates of Penguin released till now. Google Penguin search those websites who are doing over search engine optimization like Black Hat SEO, copying content, keyword stuffing, keyword density, bad back linking and more and affect those sites who are doing this bad tactics. Penguin decrease the traffic and search appearance of a site in Google search if it is affect by Penguin. So everyone shouldn't do the bad tactics in order to be safe with Google Penguin.
About The Google Penguin 2.1 Version
So, As I told you that there are total five updates released of Google Penguin and this one is released just some hours ago. In this update, most of the sites are not affected because according to the Matt Cutt's [software engineer at Google] tweet on twitter shows that only 1% of total searches are affected. It means everyone is trying to improve their webs and beating Penguin that is good for everyone but bad for those who are affected. Well, Before this update, Google has introduced another algorithm which is known as Humming Bird, who affected 90% of searches around the web. It just shocked all the webmasters and as well as bloggers. We've not discussed about it but in the upcoming post, we'll make conversation about it.
Previous Google Penguin Updates
- Penguin 1 - on April 24, 2012.
- Penguin 2 - on May 26, 2012.
- Penguin 3 - on October 5, 2012.
- Penguin 4 - on May 22, 2013.
- Penguin 5 - on October 4, 2013.
How To Check If You're Affected?
You might want to know that if your blog or site affected by Penguin 2.1 so where is what we're going to talk about. You will not get any notification, mail or message from any official place that you're affected but you can examine that you're affected or not by looking at the traffic of your blog. I think you're using Google Analytics as your traffic counter, well, land on it and check the traffic status. Do not check the all traffic sources, but only check the "Organic Traffic" which comes from the search engines. Now, if the organic traffic is decreased then you should feel that you're affected in this update and if it is same like previous or even if it is increased then you're not affected. That's how to know that we're affected or not.
Want To Recover Your Blog From This Update?
If your blog is affected in this update then you can surely recover it from penguin. Sorry, This time I'm not going to give any tips about recovering your blog from this update but as I'm going to do the research on it and will publish it here in the upcoming post. So, please wait for the next post to recover your blog. And don't forget to tell us that if you're affect or not in the comments section. Take a lot of care and keep beating penguin!
 Today, we're not going to discuss on any specific topic but I've a great news for all Blogger Yard readers. We just started accepting guest posts at Blogger Yard. If you don't know about Guest Posts then click here and check out the detailed article to understand the guest posting. Simply, In this post, I will tell you about and rules and conditions, what will you get in the back, which topics are allowed for the guest post and how to submit your guest post to us and this post will be used as a write for us page. So friends I think the intro is enough and let's begin the discussion.
Why You Should Write For Us ? - Benefits You Will Get
Below I've described some major reasons that why you should contribute with us or what kind of benefit you will get.
Author Bio With Social Links : In the last of the guest post, we will implement the guest author bio with social links and also a dofollow link. By this, readers will know about you and if they liked your content then they will surely land on your blog.
You Will Help Blogger Yard's Readers : Helping others is always a great thing. You can easily help our readers with your guest post or the article you will submit to us.
Get Quality Backlink and Traffic : This is the best thing that you will get the quality dofollow backlink in your author bio that will help you in improving external backlinks, Page Rank and in many other things. We've a decent amount of traffic here so you will surely get traffic from us.
Which Topics Are Allowed For Guest Post?
Many newbies in the guest blogging submits the irrelevant post to the blogs and in case that post is not published. It is important to check that what topics are allowed in guest posts and below I've listed all those topics which we accept for the guest post.
- Blogger Tricks, Blogger Widgets, Blogger Templates
- Newbies Guide In The Blogging World.
- Blogging Tips.
- Search Engine Optimization.
- Make Money Online.
- Useful Tools For Bloggers.
- And All About The Blogging!
Rules and Guidelines For Writing a Guest Post
For the security and legal purpose, we've some little rules for guest authors which every one needs to accept and follow. Simply, I've written down below.
- Unique Content / Not Copied : This is most important thing that your post or article must be unique and not copied from anywhere else. No matter, if you spin those articles. We've some special tools to check that a content is copied or unique.
- Article Must Be Well Written and SEO Friendly : This is the other thing on which we most focus that the article must be well written. It doesn't have grammatical mistakes. Your article must be SEO friendly in which it may not have a lot of Keyword Density or Keyword Stuffing.
- It Must Have Minimum 500 Words : The content length is also important. I recommend to write at least 500 word article otherwise it will not be accepted.
- Featured Image : You also have to send the featured or main image of the post along with the article. You can get it through Google Images or create a new one.
- Affiliate Links and Unrelated Links are not allowed in the article.
Required Info Of Author
It is also important that you will need to give the required information about the guest author so that we may give the proper credit to him/her. Here is what we're talking about.
- Well Written Author Bio With 250 Characters.
- Author's Image/ Photo
- Social Links [Optional]
- Author's Blog link. [ Link must be included in the author bio ]
How To Submit The Guest Post?
So friends, these were some little rules which you will need to follow in order to be the guest author here. No matter who you're everyone can be the guest author here. Just follow the simple rules. In the last, here is the method that how can you submit the guest post to us.
- The first thing that you've to write your post in MS word file along with the featured image and author's info.
- Collect all these files in a folder and compress that folder with WinRAR.
- Compose an email, attach that file and send it to yaqoob@bloggeryard.com
When The Post Will Be Published?
We publish one post regularly so if accept your post then will inform you that we've accepted your guest post and it will be published on the next day. I would take about 48 hours to reply you back to your application. If your post is rejected then it must be having some faults so try to improve it and re-submit it again.
Guys, I'm anxiously waiting for your guest posts. I hope you will surely contribute with us. Take Care!
Subscribe to:
Posts (Atom)

